HÜSEYIN ALDIRMAZ
STREET PHOTOGRAPHY – HUMAN & GEOMETRY
Street photography, in my mind, could also be referred to as ‘human and geometry photography’, as it often involves architectural subjects, in addition to people. But what distinguishes this genre of street shooting from the classic street photography we are used to seeing these days?
It is indeed related to the more normalised branch of street photography that we are accustomed to but it goes further through the carefully-considered, intentional use of architectural forms, perspective control, symmetrical framing, graphical view and geometrical shapes. In addition to this, graphical objects, lines, light-shadow, movement and points of interest support the composition.
Behaviour in street
There seems to be some need to be aware of the soul of the street, not being able to interfere with the model but rather having to wait somewhere patiently, tucked out of sight. After seeing the initial basic composition in your mind’s eye, you must wait for the absolute, final composition to reveal itself. In order to achieve this, you first must check the light, find the best point of view, select the focal length that would best match the scene (if you have that option) and then wait silently like a hunter until the perfect human model enters your frame. Pointing your camera at the subject for too long may get you noticed so you have to be quick when checking your framing and eventually pressing the shutter button to capture the image.
Which equipment?
Independent of brand, compact cameras make it easier to shoot on the streets and mirrorless cameras are the obvious choice. Certainly, the Fujifilm cameras and lenses that I have been using for the past two years have made me invisible on the streets because of their small dimensions and general discreetness. It is important to choose cameras that are simple to use so that you are able to concentrate on the photography itself, rather than getting lost inside the camera menu and settings. Despite the view in the photography industry that “bigger is better” when it comes to cameras and the fact that having a small camera makes you look amateurish, street photography is just one example that blows this ridiculous notion out of the water. On the streets, the more unnoticeable your camera, the better. And Fuji gear certainly helps with that, not to mention saving your back by eradicating the need for a big camera bag full of unnecessary gear.
Which settings?
Both the source and angle of light on the streets can change randomly and frequently while you are out shooting, for example when you pass from a brightly, well-lit area to an area cloaked in shadow, which will mean that you need to keep a constant eye on your camera settings. A wide depth of field is usually preferred for this genre of photography to make sure that everything in your scene is in focus. It is often a good idea to use your camera in aperture priority mode, setting your aperture to around f/8 or f/11, depending on the available light.
However, you will also need to keep close tabs on what your camera is doing with the shutter speed, particularly if you are trying to freeze the motion of a particular subject, for which a shutter speed of at least 1/125sec to 1/250sec will be needed. Alternatively, if you want to capture the feeling of the motion, you will need to set your shutter speed to something around 1/15 sec. Semi-automatic modes can really help you to concentrate on the creative side of your photography but you do need to remember to check your settings every so often.
Get through the composition
Streets are usually crowded and in certain metropoles like Istanbul, life continues 24 hours a day! This often makes for quite crowded compositions, which hinder the eye in being able to focus on the main subject. Practice and experience are key in being able to drown out the visual noise of the streets and zero in on your subject. There is also a large amount of waiting involved as you stand poised and ready to capture a good subject that makes their way into your frame. It is important to always be checking your surroundings and being ready to take the shot, since subjects usually appear very suddenly.
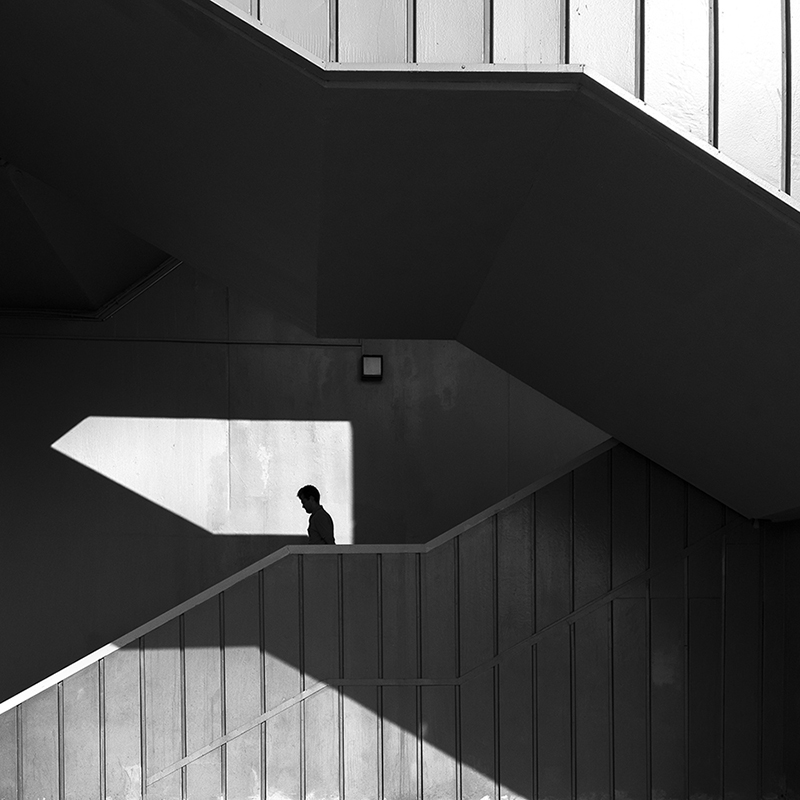
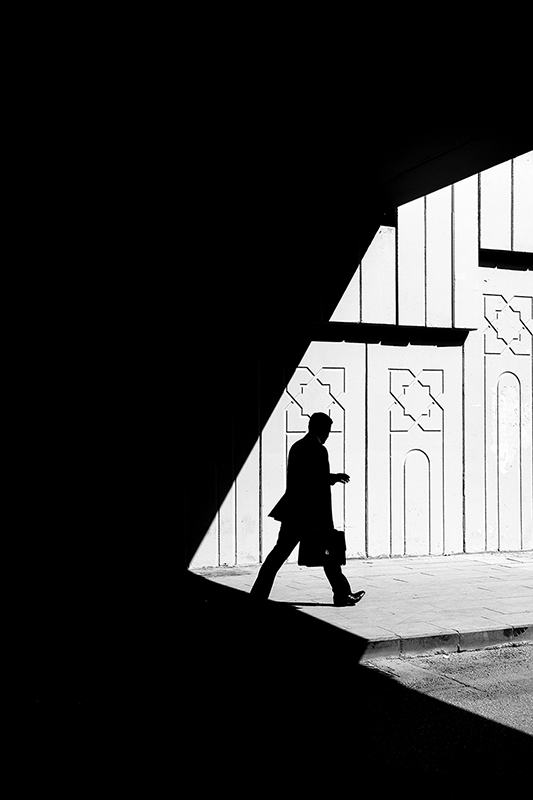
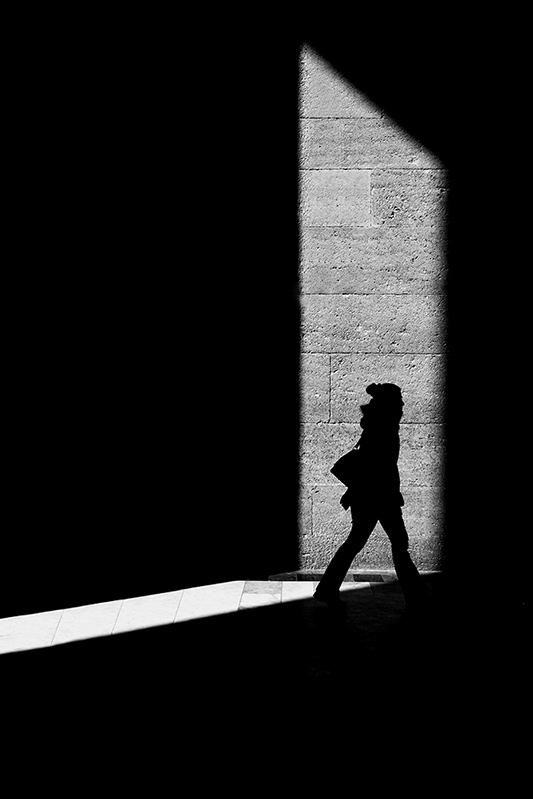
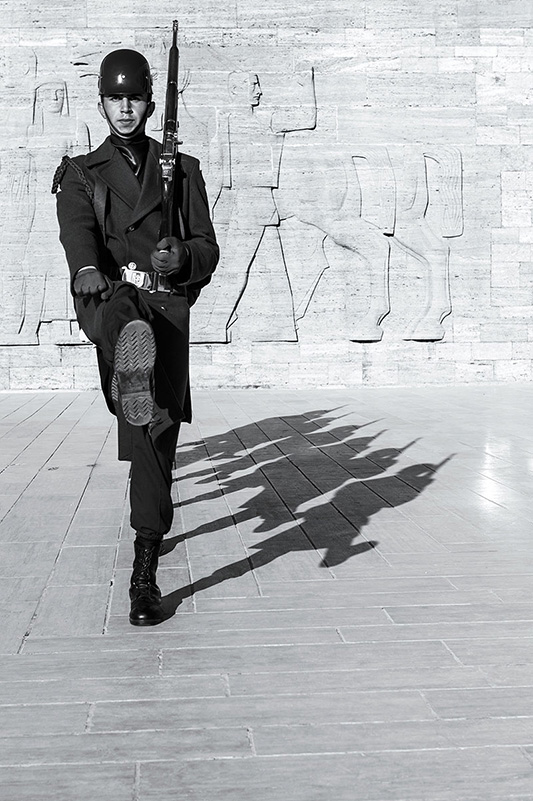
Light & shadow
As we all know, light is absolutely crucial in our photography. I think this is particularly true when capturing architectural forms, since the lighting can absolutely make or break a photo of this nature. For example, getting horizontal light is very important for architectural shooting as it helps to provide a 3D effect in the very 2D medium of photography. The time of day that you shoot is paramount, therefore. Shooting at midday, for example, is a waste of time since the vertical light will cause pale colours with hard shadows. Depending on where we are located, therefore, morning and afternoon/evening shooting is highly desirable. Horizontal light found at these times of day create wonderful shadows with long, geometric shapes in the street that will aid our composition. It is the contrast between highlights and shadows that make for really interesting visual images.
Decisive moment
The decisive moment is one of the most important things to consider in street photography. Considering that we don’t interfere with our subjects, we always have to be ready and on our guard, making sure to not miss when the subject and/or its motion reaches its peak. Stay poised until after the subject has completely moved from the frame in order to make sure you catch the best moment, and then you can feel free to check the image on your LCD screen if you need to.
You can follow your subject in two ways: either you can frame your composition and wait until the subject enters your frame or, more difficultly, you can move with the subject. The latter will make it hard to check that your framing and background is good, however. For this reason, I usually frame my shot first and wait for the decisive moment when the perfect subject enters the frame.
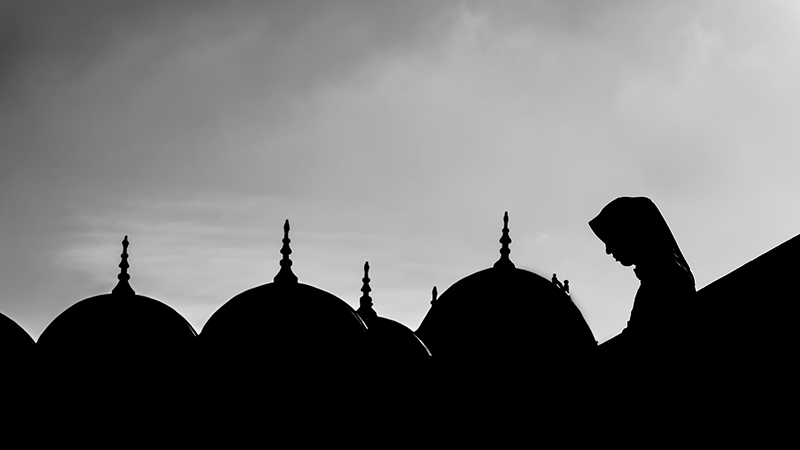
Symmetrical View Point
If there is an architectural object and we want to have a symmetrical composition in our photo, viewpoint and height are very important. After you have decided on your viewpoint, you must compose your image depending on whether the line of symmetry is going to be vertical or horizontal, making sure that the line of symmetry is aligned to the centre of your viewfinder or screen, so that the equal distance on either side of the line is evident. We then must wait until a model enters the frame.
This technique is extremely difficult because we need to keep the camera very steady in order to make sure that all our hard work of lining everything up in the viewfinder doesn’t go to waste while waiting for somebody to enter the frame, which could take a long time indeed! There is also the added problem of potentially being spotted by the subject, which could lead them to purposefully not enter your frame so as to not ‘ruin’ your photo! They may well change their direction of movement or pass behind you so as not to disturb your composition. (If only they knew that their presence in the frame is the exact thing that you’re waiting for!) To minimise this risk, it may be a good idea to choose a lens that allows you to keep your distance. Consider using a zoom lens or one with a longer focal length than you might normally use. Another method would be to wait until the last moment to draw the camera up to your eye. This will be challenging as you will only have a split second to get everything lined up correctly in the viewfinder before pressing the shutter button. Using a compact camera certainly helps in cases like these.
Harmony
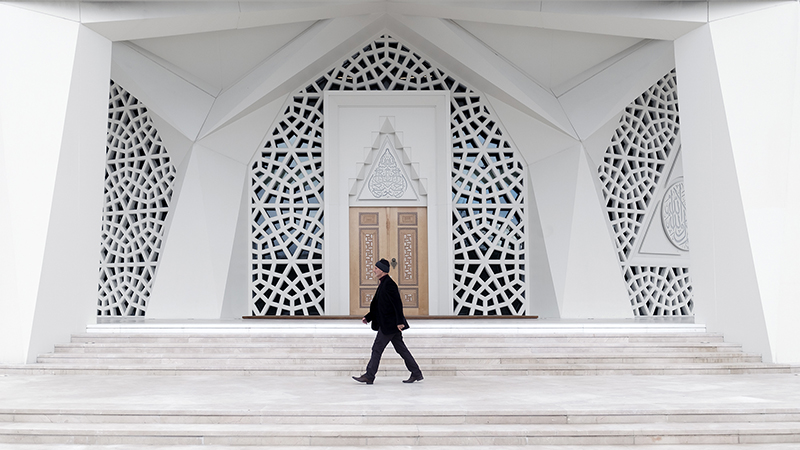
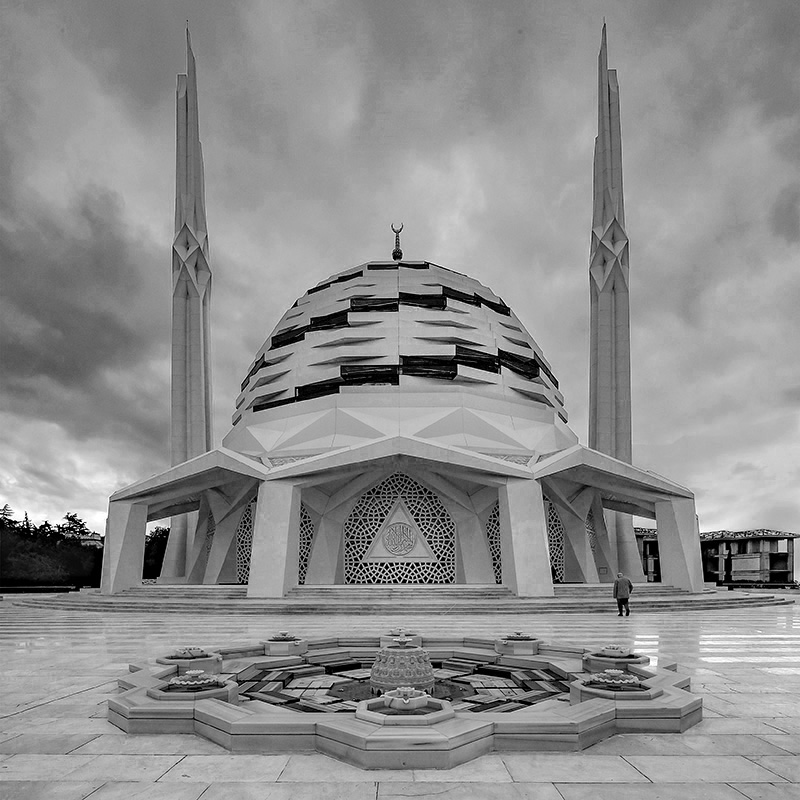
In order to have the harmony two or more elements should support each other in terms of movement, shape, colour and tone. For example, if you are taking a photo of the exterior of a mosque, you may want to wait until a subject wearing a headscarf enters the frame in order to provide unity between the two elements of the image. As I have said elsewhere in this article, you may be waiting a long time for your shot, so developing patience is crucial!
Frame
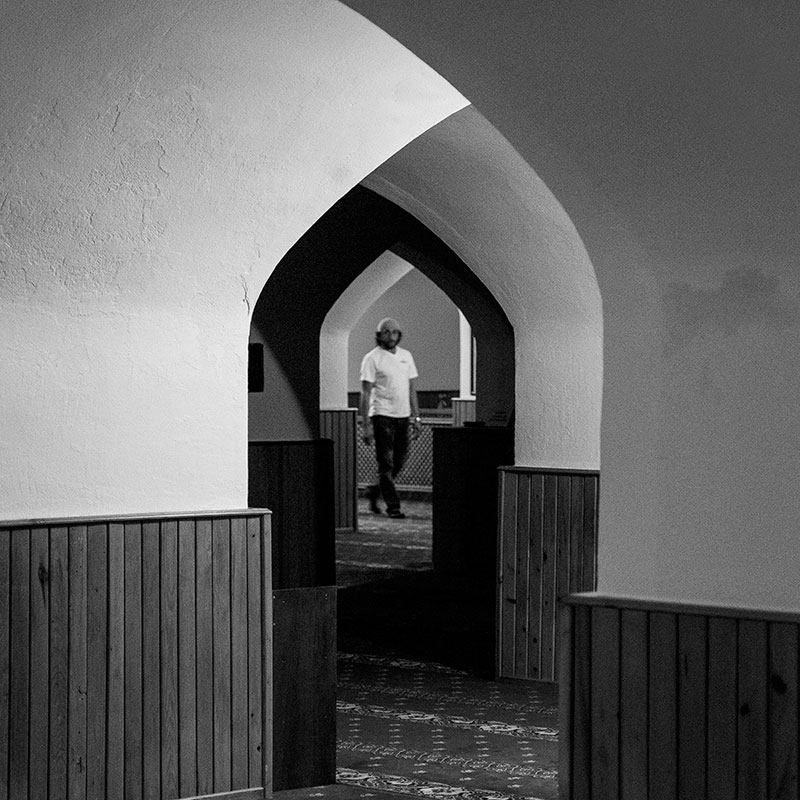
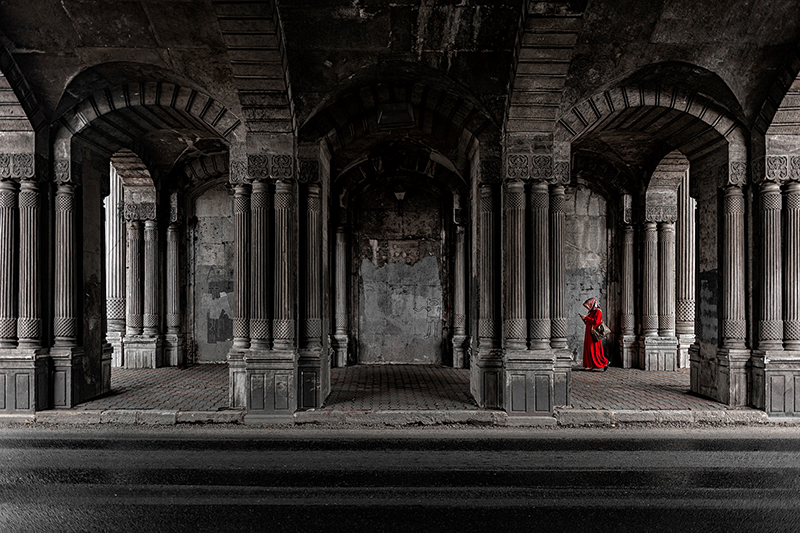
Sometimes we like to capture our subject in a ‘frame within the frame’, which utilises certain architectural structures. Using this ‘frame within the frame’ approach increases the sense of depth of the image and helps to improve composition. You can use parts of buildings, tree branches or even whole architectural structures such as arches. If using parts of buildings, you must be careful to check the horizontal and vertical lines in your image, as tilting can ruin a photo. Here, our main purpose is to capture the subject inside the frame and, in turn, keep the attention of our audience.

Control of the architectural forms
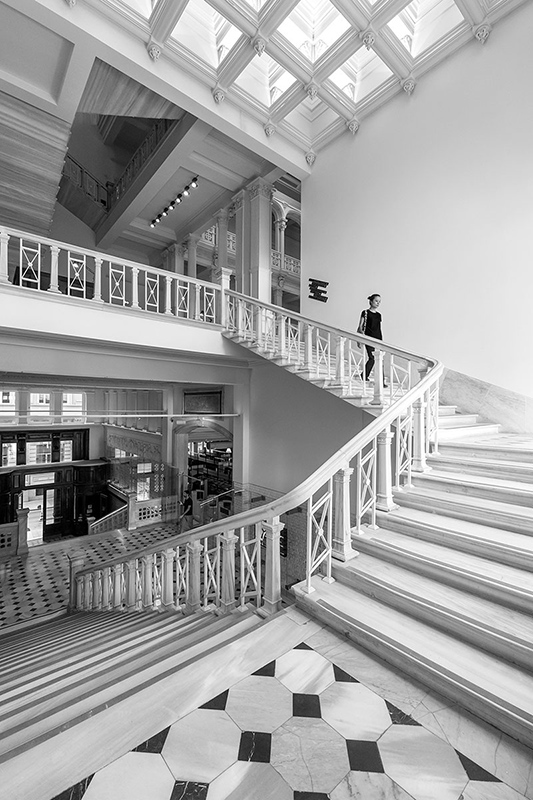
The most important part of human and geometry photography is to be found in the usage of architectural forms as I mentioned above. The most-used technique, with some exceptions, is using vertical or horizontal parallel lines across the frame. Street photographers are always competing with architectural objects entering the frame so it is important to decide which parts and dimensions to include in the frame, and which viewpoint and height will be used. Control of perspective of structures is very important.
At this point we really need wide angle lenses and we have to master the different effects on perspective that wide angle lenses have. It is important to use a low distortion lens like the Fujinon 10-24mmF4. I use this lens frequently and have very rarely had problems with distortion. Be careful with this if you don’t want to spend time in Photoshop! We have to carefully calculate the placement of the centre of attention in the frame, which will be different from pure architectural or pure street photography.
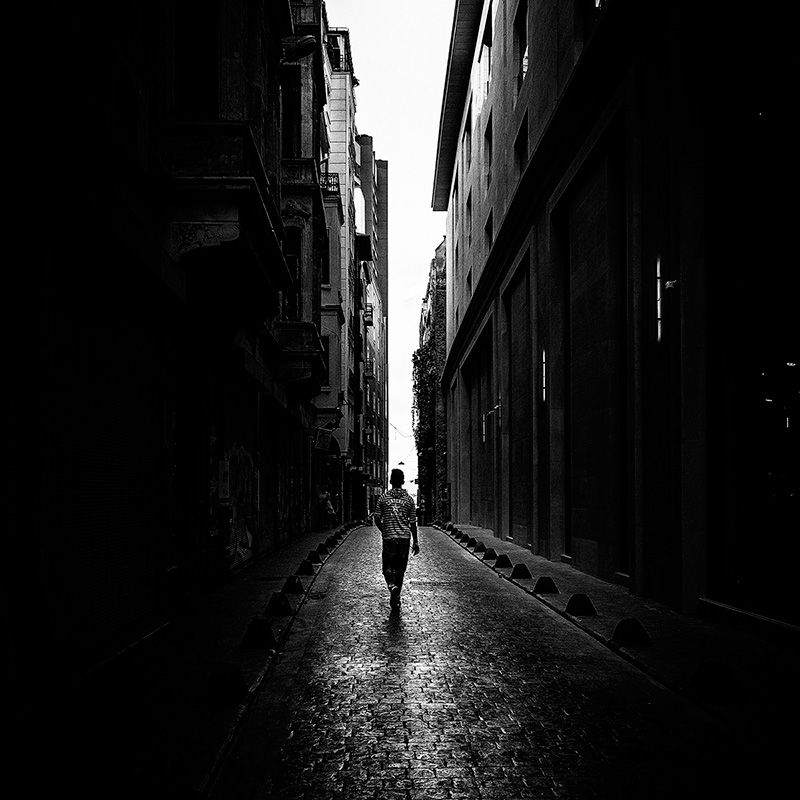
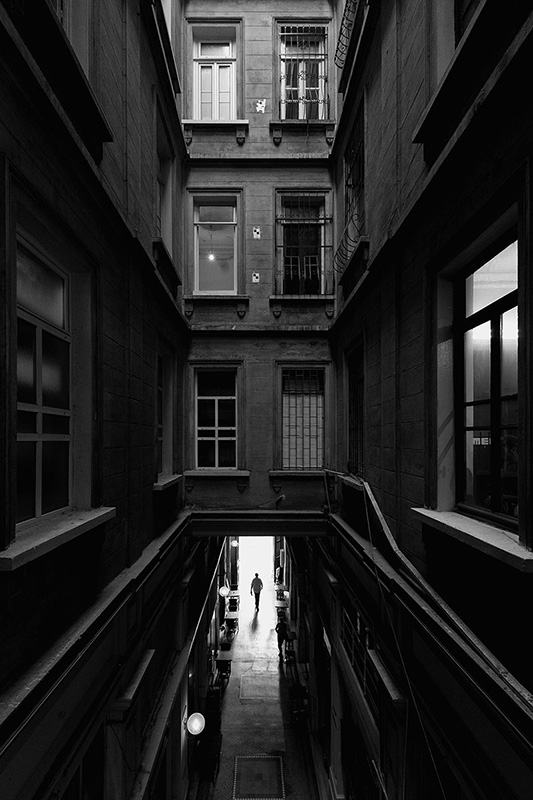
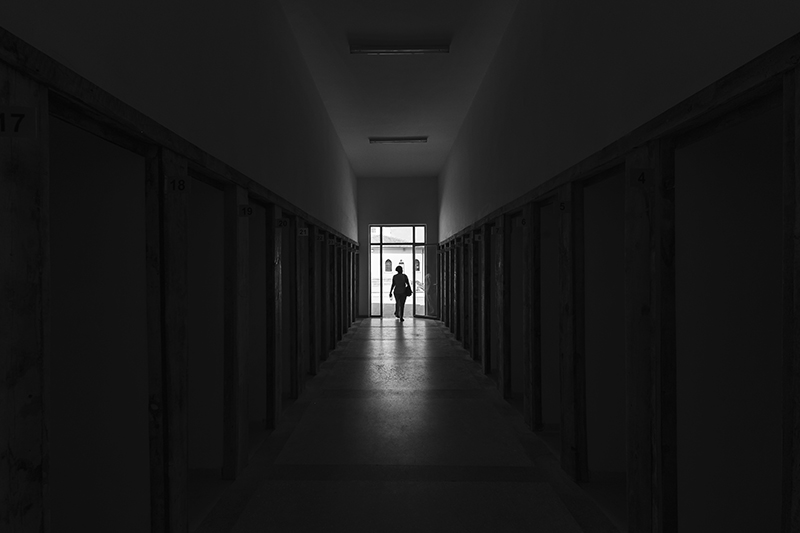
Perspective
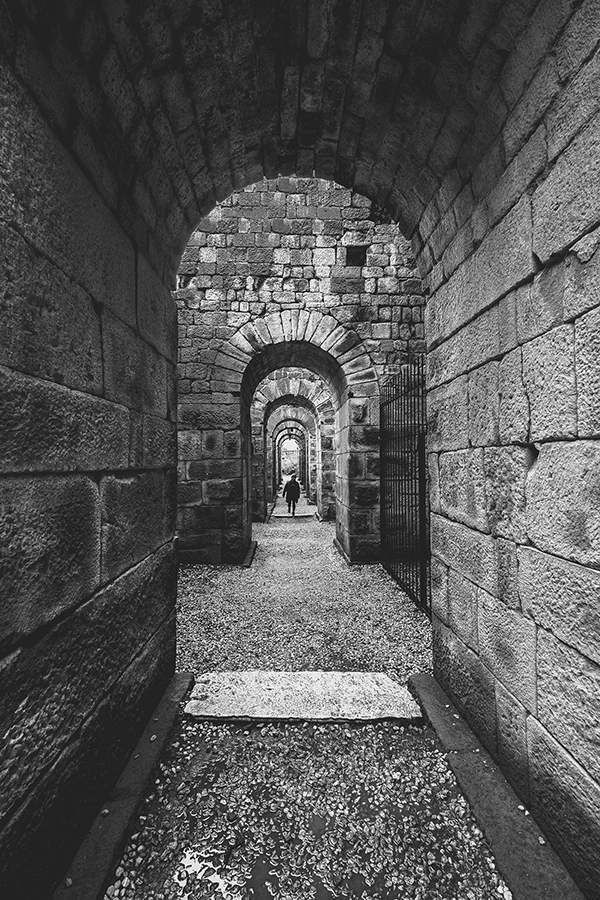
It is always preferable to use wide angle lenses when we want to highlight perspective, since they increase the effect of depth and to be able to give a wider context to the whole image. While taking a photo in a narrow street or in a long corridor in a building, highlighting perspective would be very wise because of the sense of depth that you will be able to achieve. Another way to increase the perspective effect is to frame your subject away from the line of symmetry, making sure they are placed at the outmost point in the frame. Of course you can change your point of view but the aim here is to show what you want portray.
Guiding the Eye
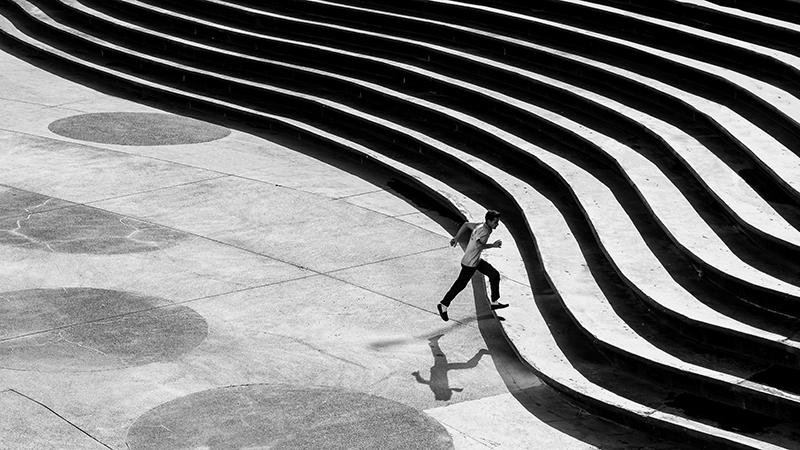
When we want to emphasize human and geometry, we usually use graphical objects, geometrical shapes and lines. But we have to know how to use them. The camera should be absolutely straight, and verticals and horizontals should be parallel to the sensor, while diagonals, should be carefully controlled. You should set your point of view and height correctly while using the lines and shapes. While setting the composition, you shouldn’t forget that horizontal lines are stable so you should also use vertical and cross lines. The human eye tends to follow cross lines from diagonals. At this point, the subject also has to be carefully placed within these lines to make a successful photo.
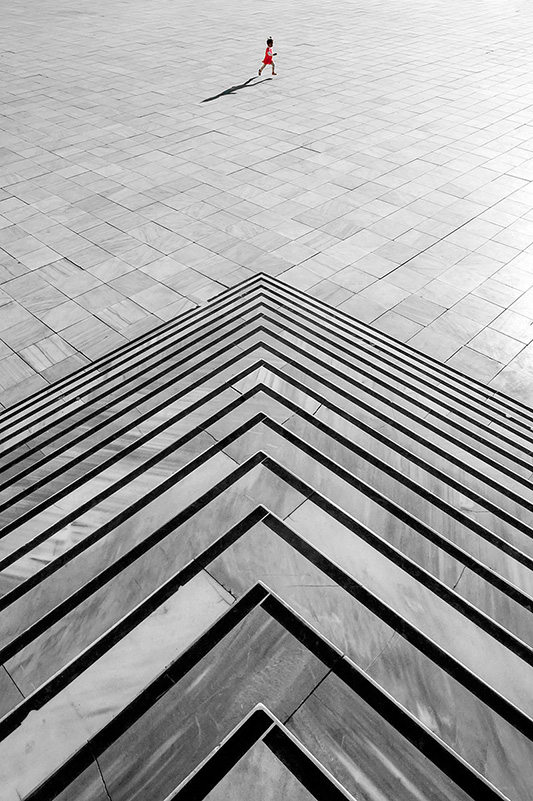
Contrast
The purpose of contrast is to basically emphasise an element of discrepancy. There are several usages of contrast: contrast according to size, contrast in motion, contrast in shape, contrast in colour, contrast in content, and so on. Contrast is a subject frequently met in street photography. Usually the meaning behind the contrast is what gives us a powerful image.
In conclusion…
As many people advise, it is a good idea to make sure you’re looking at good photos regularly, reading lots of books, especially ones that will improve your knowledge about perspective. Produce lots of photos of architectural photography, graphical shapes, light and shadows. Share your images with experienced photographers to gain constructive criticism and be open to that criticism, acknowledging you will sometimes fail. Educate your eyes by going out and shooting regularly, never forgetting that improvement in photography can not be earned instantly. Time is needed – one day a week is probably not going to be sufficient; photography should be the centre of your life! Progress is certain if you have talent and are willing to put in the time and energy it takes to practise. Let me end with a quote: “Talent is nothing without heavy work, never forseen the power of practice.”
All Rights Reserved ©️Hüseyin Aldırmaz
©️Hüseyin Aldırmaz. Bütün yayın hakları saklıdır. Kaynak gösterilerek tanıtım için yapılacak kısa alıntılar dışında yazar ve fotoğrafçının yazılı izni olmaksızın hiçbir yolla çoğaltılamazve kullanılamaz.